If you haven’t already try out Google Cloud Platform, you should do it soon — with the world’s largest tech company offering cloud services on the same infrastructure as its own products, it pretty much sums up everything there is to say about the platform.
Recently, I switched away from using old-school web hosting providers to hosting my blog on Google Cloud Platform. I used the Cloud Launcher to fire up a WordPress instance via Bitnami and had Google Cloud Platform pull up a monthly estimate for that — 4.49 monthly for a Debian OS virtual machine! Not bad for a start (after long term use discounts)!
I wanted to point it to a domain name that I had recently bought from GoDaddy. GoDaddy comes with DNS service so it was pretty simple to configure a static IP address to the DNS service and perform some masking. The not-so-straightforward portion was how do I configure a permanent static external IP address for my Compute Engine?
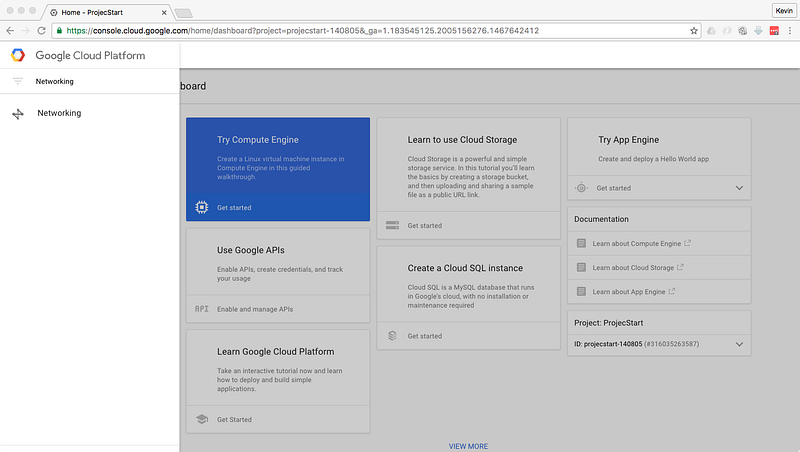
To configure a static external IP address, you need to reserve it in your Google Cloud Platform. You can find this under the “Networking” section that you can access from your GCP Console:

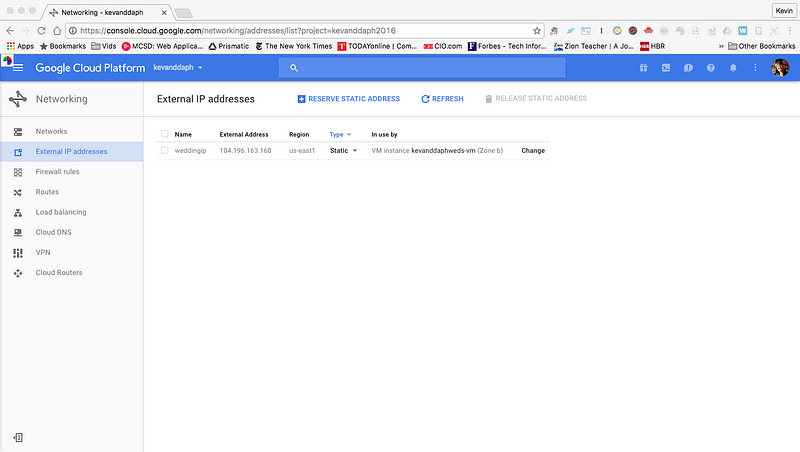
Once in “Networking”, select “External IP Addresses” on the left hand side of the screen:

Click on “Reserve Static Address” on the top bar, just below the nav bar:

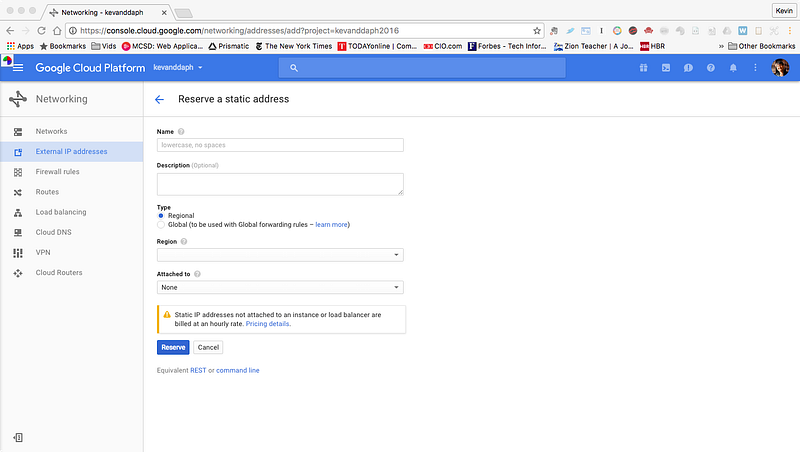
Fill in the details on this screen. You might want to check out what “Global” does under the section “Type”. I have selected “Regional” in this case as there wasn’t a need for me to perform load-balancing. You must attach your reserved static IP address to a Virtual Machine (Compute Engine) instance or a Load Balancer instance:

Once you are done, click “Reserve” and Google would reserve a static external IP address for you. As with many cloud platforms, there’s lots of abstraction done from the user interface so it would take a while for the static IP to be reserved (Tip: On the top right hand corner, next to your user profile picture, there are notifications that you can check on without going back to the Networking section).
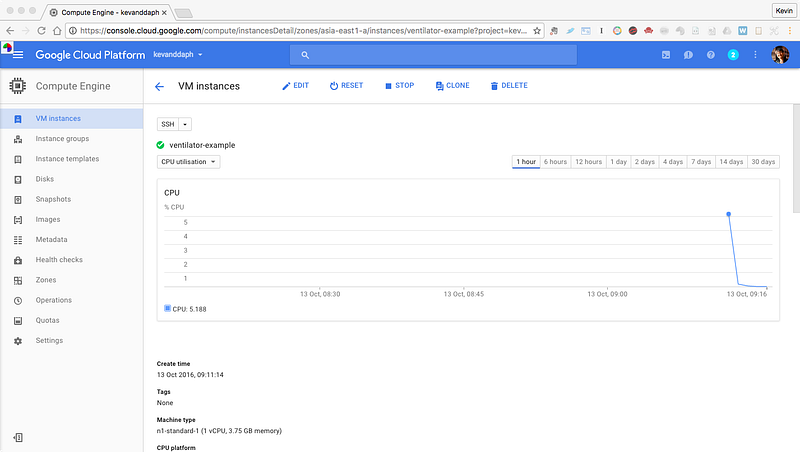
Once the IP address is reserved, go to the Compute Engine instance and click on “Edit”:

Scroll down until you find “External IP”, and then, assign it under the reserved IP address. Scroll further down and click “Save” and you would have configured your Compute Engine with an external IP address. If you have installed WordPress on your Compute Engine, typing this external IP address would bring you to to the WordPress site.
The next step is to configure your domain name to point to your Compute Engine External IP. Different web hosting companies do it differently, but I am going to share with you a few things you need to take note:
- Domain Name Server(DNS) — It is not good to just have a domain registered! You need a DNS to point your domain to the Compute Engine External IP. Check with your domain name registrar if they provide this with your purchase, otherwise, source for a free DNS or pay for a premium DNS provider.
- Forwarding & Masking — Chances are, you won’t want your ugly Compute Engine External IP to show after users have been forwarded from your pretty domain to your website. You would want to turn on Forwarding & Masking when configuring your domain name.
- Changes Take a While — For each change that you make to your domain name server configuration, it would take a few minutes to propagate. So factor this in — sometimes setting up the domain name would take a long time too!
In any case, if you are going for GoDaddy, contact the provider if you face problems with configuring your custom domain to point to your Compute Engine. They won’t be able to help you with your Compute Engine, but they definitely can point your domain to the Compute Engine external IP (provided your registrar has a DNS service included in the package).
With this option, you can practically move away from the traditional time-bound web hosting package as you can shut down your Compute Engine when you don’t need it and fire it back up when the time comes. Do note that reserved static IP address must be assigned to an instance, if not, Google would charge you for hogging that external IP address.


