App Service domains (preview) are top-level domains that are managed directly in Azure. They make it easy to manage custom domains for Azure App Service. This tutorial shows you how to buy an App Service domain and assign DNS names to Azure App Service.
For Azure VM or Azure Storage, see Assign App Service domain to Azure VM or Azure Storage. For Cloud Services, see Configuring a custom domain name for an Azure cloud service.
Prerequisites
To complete this tutorial:
- Create an App Service app, or use an app that you created for another tutorial.
- Remove the spending limit on your subscription. You cannot buy App Service domains with free subscription credits.
Prepare the app
Note
App Service Free and Shared (preview) hosting plans are base tiers that run on the same Azure virtual machines as other App Service apps. Some apps might belong to other customers. These tiers are intended to be used only for development and testing purposes.
To use custom domains in Azure App Service, your app’s App Service plan must be a paid tier (Shared, Basic, Standard, or Premium). In this step, you make sure that the app is in the supported pricing tier.
Sign in to Azure
Open the Azure portal and sign in with your Azure account.
Navigate to the app in the Azure portal
From the left menu, select App Services, and then select the name of the app.

You see the management page of the App Service app.
Check the pricing tier
In the left navigation of the app page, scroll to the Settings section and select Scale up (App Service plan).

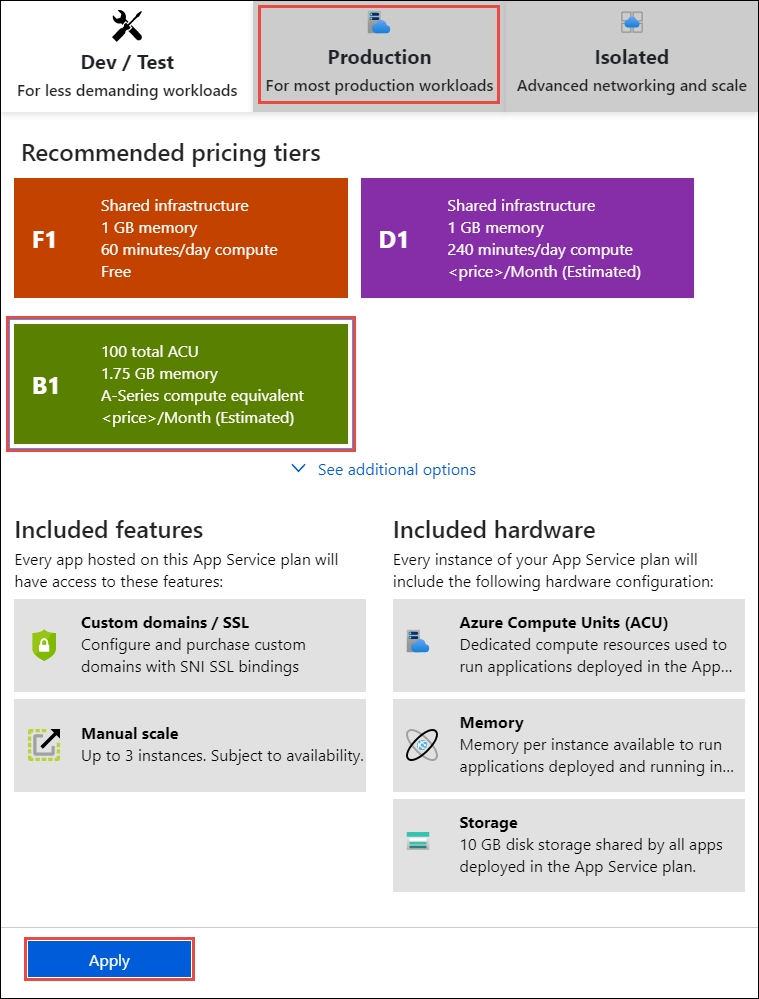
The app’s current tier is highlighted by a blue border. Check to make sure that the app is not in the F1 tier. Custom DNS is not supported in the F1 tier.

If the App Service plan is not in the F1 tier, close the Scale up page and skip to Buy the domain.
Scale up the App Service plan
Select any of the non-free tiers (D1, B1, B2, B3, or any tier in the Production category). For additional options, click See additional options.
Click Apply.
When you see the following notification, the scale operation is complete.

Buy the domain
Pricing Information
For pricing information on Azure App Service Domains, please visit the App Service Pricing page and scroll down to App Service Domain.
Sign in to Azure
Open the Azure portal and sign in with your Azure account.
Launch Buy domains
In the App Services tab, click the name of your app, select Settings, and then select Custom domains

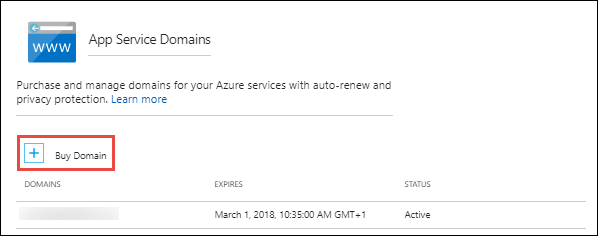
In the Custom domains page, click Buy Domain.
Note
If you cannot see the App Service Domains section, you need to remove the spending limit on your Azure account (see Prerequisites).
Configure the domain purchase
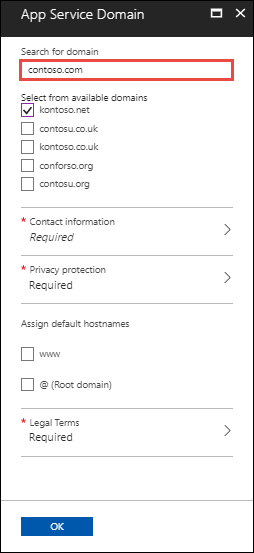
In the App Service Domain page, in the Search for domain box, type the domain name you want to buy and type Enter. The suggested available domains are shown just below the text box. Select one or more domains you want to buy.
Note
The following top-level domains are supported by App Service domains: com, net, co.uk, org, nl, in, biz, org.uk, and co.in.
Click the Contact Information and fill out the domain’s contact information form. When finished, click OK to return to the App Service Domain page.
It is important that you fill out all required fields with as much accuracy as possible. Incorrect data for contact information can result in failure to purchase domains.
Next, select the desired options for your domain. See the following table for explanations:
| Setting | Suggested Value | Description |
|---|---|---|
| Privacy protection | Enable | Opt in to “Privacy protection”, which is included in the purchase price for free. Some top-level domains are managed by registrars that do not support privacy protection, and they are listed on the Privacy protection page. |
| Assign default hostnames | www and @ | Select the desired hostname bindings, if desired. When the domain purchase operation is complete, your app can be accessed at the selected hostnames. If the app is behind Azure Traffic Manager, you don’t see the option to assign the root domain (@), because Traffic Manager does not support A records. You can make changes to the hostname assignments after the domain purchase completes. |
Accept terms and purchase
Click Legal Terms to review the terms and the charges, then click Buy.
Note
App Service Domains use Azure DNS to host the domains. In addition to the domain registration fee, usage charges for Azure DNS apply. For information, see Azure DNS Pricing.
Back in the App Service Domain page, click OK. While the operation is in progress, you see the following notifications:


Test the hostnames
If you have assigned default hostnames to your app, you also see a success notification for each selected hostname.

You also see the selected hostnames in the Custom domains page, in the Custom Hostnames section.
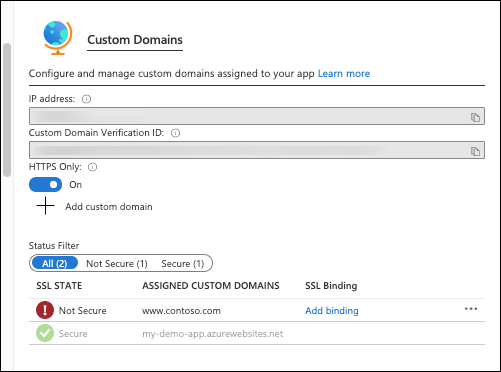
To test the hostnames, navigate to the listed hostnames in the browser. In the example in the preceding screenshot, try navigating to kontoso.net and www.kontoso.net.
Assign hostnames to app
If you choose not to assign one or more default hostnames to your app during the purchase process, or if you need to assign a hostname not listed, you can assign a hostname at anytime.
You can also assign hostnames in the App Service Domain to any other app. The steps depend on whether the App Service Domain and the app belong to the same subscription.
- Different subscription: Map custom DNS records from the App Service Domain to the app like an externally purchased domain. For information on adding custom DNS names to an App Service Domain, see Manage custom DNS records. To map an external purchased domain to an app, see Map an existing custom DNS name to Azure App Service.
- Same subscription: Use the following steps.
Launch add hostname
In the App Services page, select the name of your app that you want to assign hostnames to, select Settings, and then select Custom domains.

Make sure that your purchased domain is listed in the App Service Domains section, but don’t select it.

Note
All App Service Domains in the same subscription are shown in the app’s Custom domains page. If your domain is in the app’s subscription, but you cannot see it in the app’s Custom domains page, try reopening the Custom domains page or refresh the webpage. Also, check the notification bell at the top of the Azure portal for progress or creation failures.
Select Add hostname.
Configure hostname
In the Add hostname dialog, type the fully qualified domain name of your App Service Domain or any subdomain. For example:
- kontoso.net
- www.kontoso.net
- abc.kontoso.net
When finished, select Validate. The hostname record type is automatically selected for you.
Select Add hostname.
When the operation is complete, you see a success notification for the assigned hostname.

Close add hostname
In the Add hostname page, assign any other hostname to your app, as desired. When finished, close the Add hostname page.
You should now see the newly assigned hostname(s) in your app’s Custom domains page.
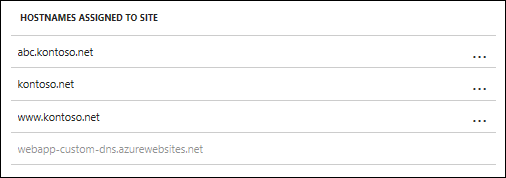
Test the hostnames
Navigate to the listed hostnames in the browser. In the example in the preceding screenshot, try navigating to abc.kontoso.net.
Renew the domain
The App Service domain you bought is valid for one year from the time of purchase. By default, the domain is configured to renew automatically by charging your payment method for the next year. If you want to turn off automatic renewal, or if you want to manually renew your domain, follow the steps here.
In the App Services tab, click the name of your app, select Settings, and then select Custom domains.

In the App Service Domains section, select the domain you want to configure.

From the left navigation of the domain, select Domain renewal. To stop renewing your domain automatically, select Off, and then Save.
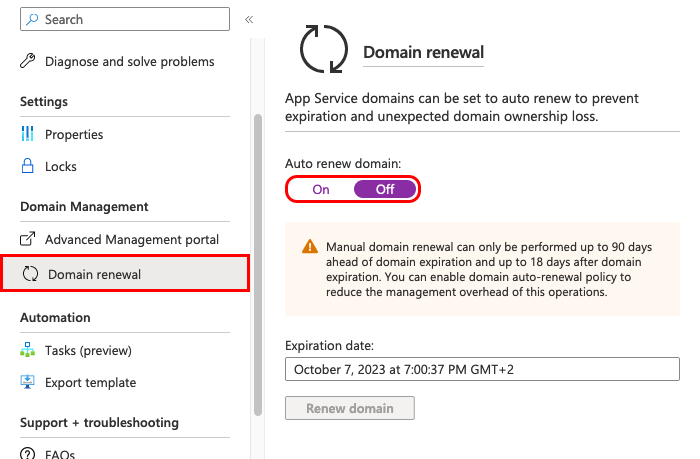
To manually renew your domain, select Renew domain. However, this button is not active until 90 days before the domain’s expiration.
Manage custom DNS records
In Azure, DNS records for an App Service Domain are managed using Azure DNS. You can add, remove, and update DNS records, just like for an externally purchased domain.
Open App Service Domain
In the Azure portal, from the left menu, select All services > App Service Domains.
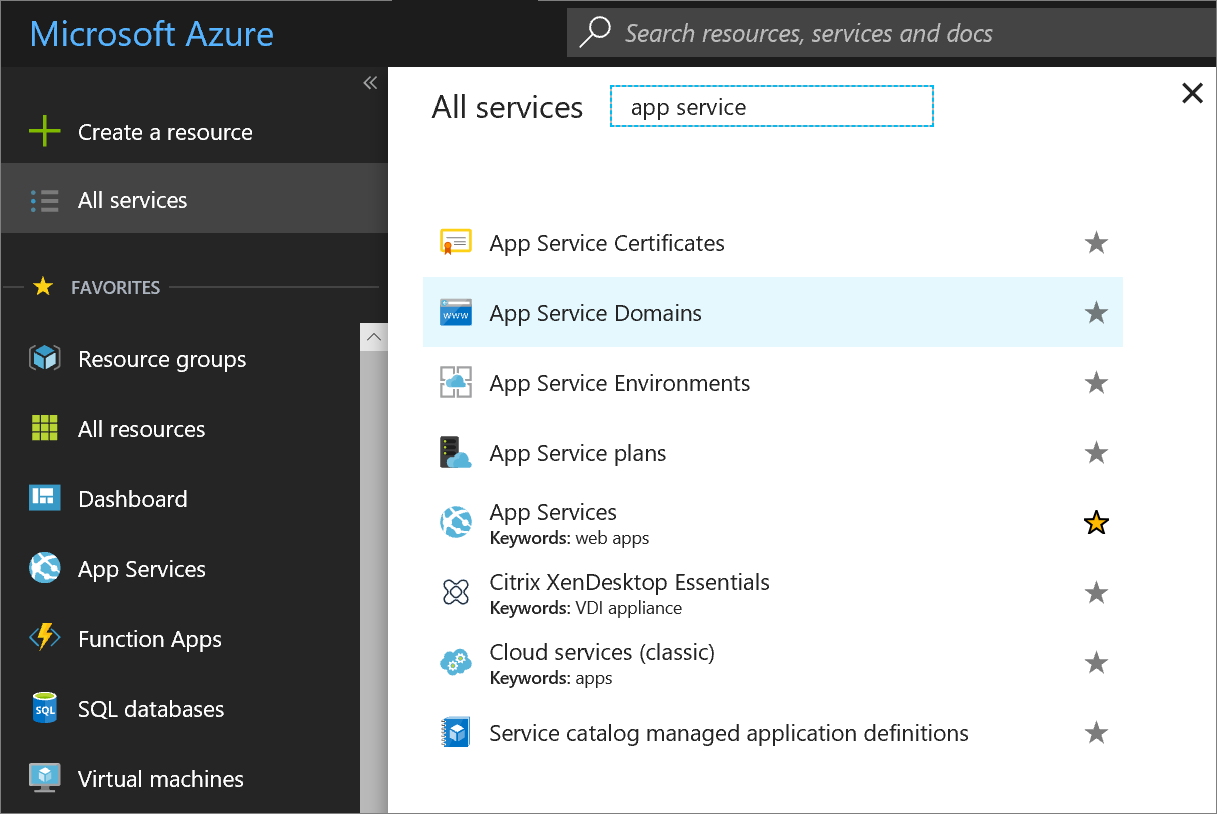
Select the domain to manage.
Access DNS zone
In the domain’s left menu, select DNS zone.
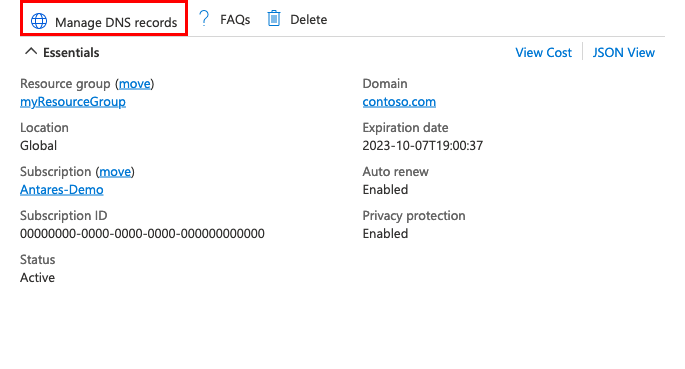
This action opens the DNS zone page of your App Service Domain in Azure DNS. For information on how to edit DNS records, see How to manage DNS Zones in the Azure portal.
Cancel purchase (delete domain)
After you purchase the App Service Domain, you have five days to cancel your purchase for a full refund. After five days, you can delete the App Service Domain, but cannot receive a refund.
Open App Service Domain
In the Azure portal, from the left menu, select All services > App Service Domains.

Select the domain to you want to cancel or delete.
Delete hostname bindings
In the domain’s left menu, select Hostname bindings. The hostname bindings from all Azure services are listed here.
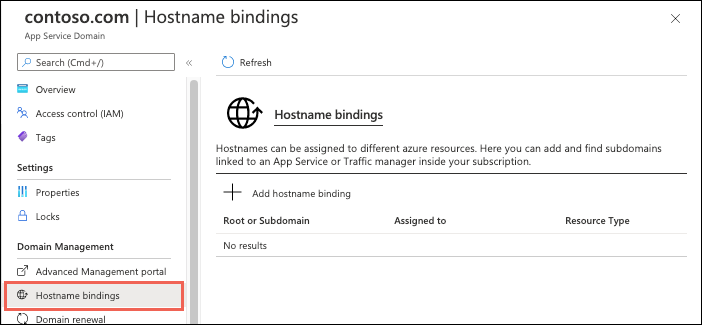
You cannot delete the App Service Domain until all hostname bindings are deleted.
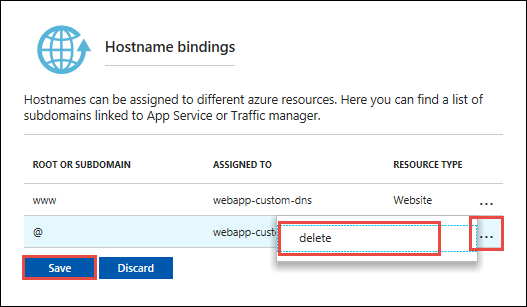
Delete each hostname binding by selecting … > Delete. After all the bindings are deleted, select Save.
Cancel or delete
In the domain’s left menu, select Overview.
If the cancellation period on the purchased domain has not elapsed, select Cancel purchase. Otherwise, you see a Delete button instead. To delete the domain without a refund, select Delete.

To confirm the operation, select Yes.
After the operation is complete, the domain is released from your subscription and available for anyone to purchase again.
Direct default URL to a custom directory
By default, App Service directs web requests to the root directory of your app code. To direct them to a subdirectory, such as public, see Direct default URL to a custom directory.


