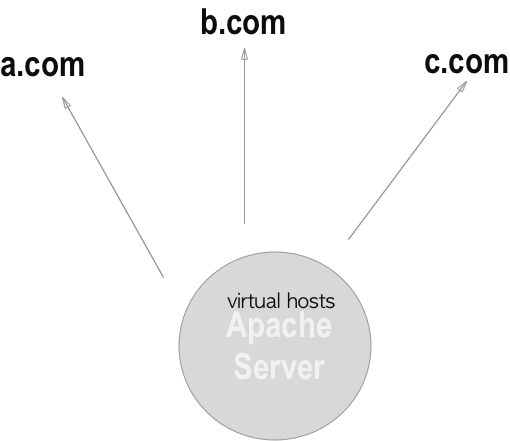
This post will be about hosting more than one webisites on single VM instance of Google Cloud Compute Engine with custom domains using Apache 2.
Brief:
To host multiple websites on ‘Google Compute Engine’ we need to first of all have our single website hosted , i.e. server has to be installed already. Now by creating ‘domain.conf’ files for ‘sites-available’ for your other domains we will be able to tell the server to route to different directories depending on ‘host’ header of request. This is basically creating the virtual hosts in Apache. Now point the domain name to server using IP of your compute engine VM. After few time ( of propagation phase ) you will be able to visit both the websites that are hosted and served from single VM instance in Google cloud compute engine.
Detailed :
Before starting, you will need the following:
- An Activated Google Cloud Platform ( GCP ) account. If you haven’t already , goto GCP website and tap on ‘TRY IT FREE’, you will be asked for credit/debit card details and may get $300 Trial Credits.
- A project created.
- A running VM instance of GCP Compute Engine with apache2 installed.
- Some familiarity with DNS
Although I’m assuming that you have already installed apache server and successfully hosted a website on, I will go through setting it up just in case (feel free to skip the following section).
Creating a VM instance on GCP Compute Engine:
- Head On to GCP Console. Now If haven’t already created a project you will be seeing a screen which will ask to create project, click on that and create a project.
- Navigate to your Project. Verify it by drop down project chooser.

- Now from side-menu (revealed by tapping on hamburger icon ) Click on ‘Compute Engine’.
- Navigate to ‘VM Instances’ and click on ‘CREATE INSTANCE’.
- Now fill the Name and Configuration of VM, fill any name. For now select machine type as ‘f1-micro’ and Boot Image as ‘Ubuntu 16.04 LTS’ and check on ‘Allow HTTTP traffic’ under firewall section.
- Click on ‘Create’ button and you are done for now.
Hosting first website:
- For hosting website we will need a server set up on our VM instance. We will be installing apache2 server on our VM intance.
- Navigate to VM Instances in Compute Engine and click on ‘SSH’

- You will be directed to a browser window / tab with a terminal connected to your VM instance.
- Now execute following command on terminal (opened in browser)
sudo apt-get install apache2
enter ‘y’ if prompted.
- Now you can put your files to be hosted at location ‘/var/www/html/’ . For the Demo purpose execute following command which will create a test page for our server.
cd /var/www/html
sudo echo “<html><head><title>Hello</title></head><body><h1>Test Page</h1></body></html>” >> index.html
- Now navigate back to VM Intances list page and click on external IP address mentioned repective to your VM name. It will redirect you to on a new tab where you should see the test page we just created.
- In This state we have successfully hosted a website (currently a webpage only). If we want our page to be accessible using a domain name, then we will need to point our domain name towards our instance’s IP address. Go to your repective domain seller’s account and find DNS settings, edit the A Record their and fill in the External IP Address of you r VM Instance in that. After few moments the website should be accessible via your domain name. For example the one shown in image below. You can also add a CNAME for ‘www’ subdomain to visit website using general fashion of ‘http://www.example.com’ instead of ‘http://example.com’.

- You can even opt for DNS service by Google by crerating a zone in Google Cloud DNS ( Available Under Networking Section ) and point your nameserveres as created for your zone.
Hosting Another Website on Same Compute Engine VM
For Hosting another website on same machine, you will need to create ‘domain.conf’ files and create Virtual Hosts in Apache server. Lets start.
- Naviagte to VM instance page and SSH into your VM.
- Now in terminal, use ‘cd’ command to naviagate to sites-available directory of apache
cd /etc/apache2/sites-available/
- Now in this directory we will use default conf file to create one for our webistes. Assuming you have two domains ‘domain1.com’ and ‘domain2.com’, lets create conf files for both.
- copy default conf:
sudo cp 000-default.conf domain1.com.conf
sudo cp 000-default.conf domain2.com.conf
- Using ‘nano’ or ‘vi(m)’ edit the files to reflect following data
ServerName example.com
ServerAlias www.example.com
ServerAdmin [email protected]
DocumentRoot /var/www/example.com/html
where example.com should be replaced with ‘domain1.com’ and ‘domain2.com’ in respective files.
Following steps show how to do it for one file — lets say domain1.com
sudo nano domain1.com.conf
this will open editor, now edit and make changes and use ‘Cmd + C’ or ‘Ctrl + C’ as per your OS, when prompted enter ‘y’. Changes will be saved.
- Next Step is to Enable these configurations and also relocate and add test pages for our websites.
- firstly Lets relocate the files at right position.
cd /var/www/
sudo mkdir domain1.com
sudo mkdir domain2.com
cd domain1.com
sudo mkdir html
sudo echo “<html><head><title>Hello</title></head><body><h1>Test Page for domain1</h1></body></html>” >> index.html
cd /var/www/domain2.com/
sudo mkdir html
sudo echo “<html><head><title>Hello</title></head><body><h1>Test Page for domain2</h1></body></html>” >> index.html
- Now lets enable the Configurations
sudo a2ensite domain1.com
sudo a2ensite domain2.com
sudo service apache2 restart
Now we need to correct DNS settings for all the domains added in this manner. The A Record of all websites should point to this VM instance’s IP address. Changes may take time to propogate on the internet, but you will be able to visit both the domains serving different files.


