Do you want to automatically post to Facebook from your WordPress site? Facebook is the largest social media platform in the world with more than a billion users. It is also one of the largest source of traffic for many websites. In this article, we will show you how to automatically post to Facebook from WordPress to increase your social media following and traffic.
Why Automatically Share WordPress Posts on Facebook?
Facebook has a huge user base, and it can be a significant source of traffic for your website. However, you will need to engage with users on Facebook to build a strong following.
While you can’t automate engagement, one thing you can automate is sharing your blog content on your Facebook page or profile.
We’ll show you multiple ways to do that, and you can choose the one that works best for you.
Since this is a lengthy article, we have added a table of contents for easier navigation.
- Automatically Post to Facebook from WordPress Using IFTTT
- Automatically Post to Facebook Using Buffer
- Automatically Post to Facebook Using a WordPress Plugin
Method 1: Automatically Post to Facebook from WordPress Using IFTTT
IFTTT is a popular online tool that allows you to automate your online accounts and make internet work for you. IFTTT is short for ‘If This Then That’.
It allows you to define applets. Each applet connects your two online accounts. It looks for a trigger on one account, and if the trigger is found, then it performs your predefined action on the other account.
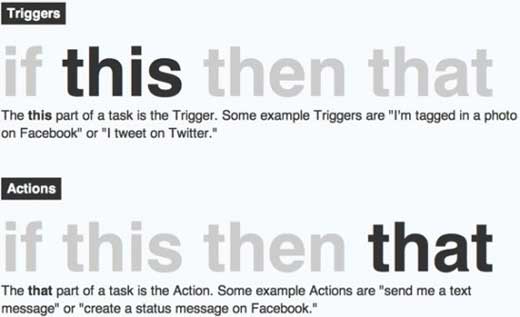
You can make IFTTT automatically post to your Facebook account when you publish a new post on WordPress.
Here is how you would do that.
First you need to visit the IFTTT website and create a new account.
After sign up, you need to click on your username in the upper right corner of the screen and then select ‘New Applet’.
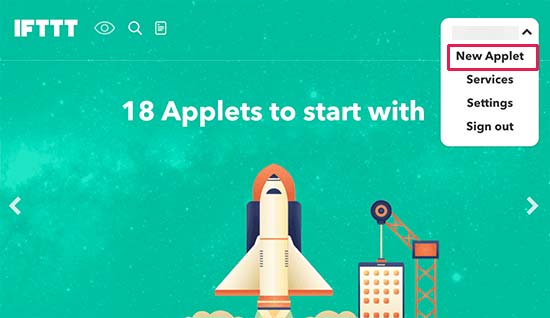
This will start the IFTTT wizard.
First you need to click on the +this link to start the wizard.

Next, IFTTT will ask you to choose a service. Type WordPress in the search box and then select it.
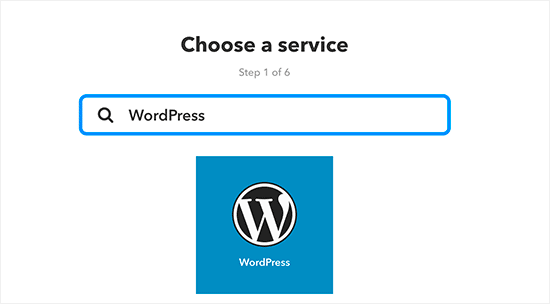
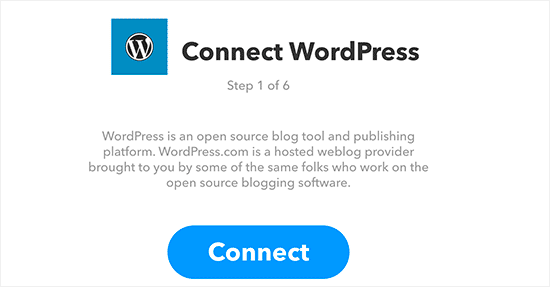
IFTTT will now ask you to connect your WordPress site. Click on the connect button to continue.
This will bring up a popup where you will be asked to enter your WordPress site’s address, your login email or username, and your WordPress password.
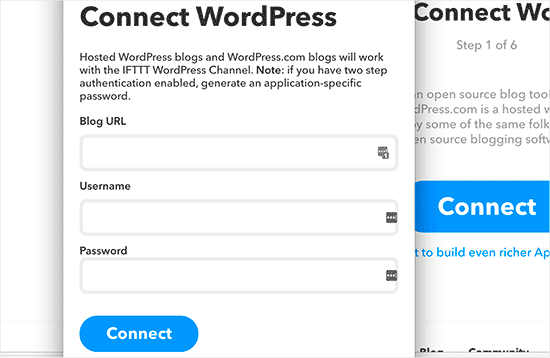
After entering this information, click on the connect button to continue.
IFTTT will now save your information and connect to your WordPress site.
Next, it will show you the triggers you can select for your WordPress site. You can choose when any new post is published, or when a post is published in specific category or tag.
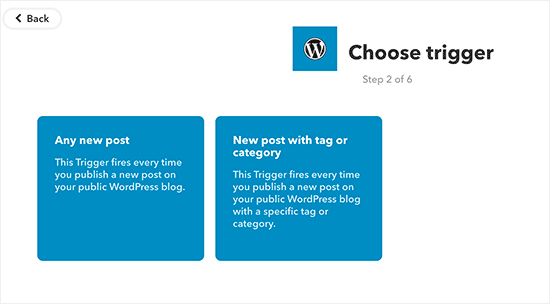
Click on any new post box to continue.
This will bring you to the ‘that’ part of your IFTTT applet. Click on the +that link to continue.

IFTTT will now again ask you to select a service. This will be the service where you want an action to be performed by IFTTT automatically.
In this case, you will search and select Facebook.
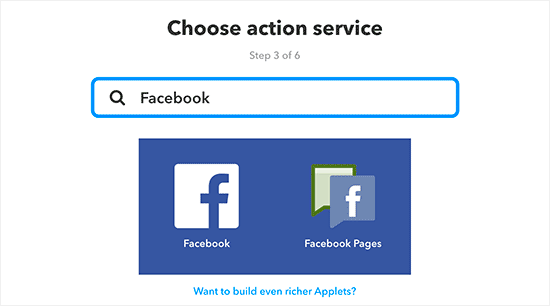
If you want to post to your personal profile, then you can select Facebook. If you want to post to a Facebook Page, then click on Facebook Pages.
Again a popup will appear where Facebook will ask for your permission. Go ahead and connect your Facebook account to IFTTT.
You will then see the actions you can take on Facebook.
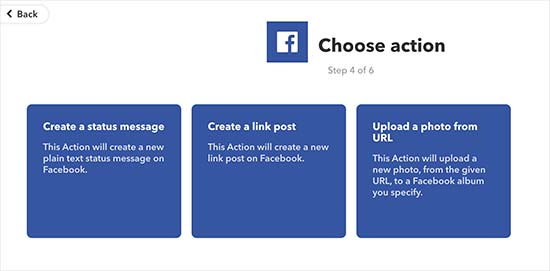
You need to click on ‘Create a Link Post’ box to continue.
IFTTT will show you action settings. Here you can change how you want the post to appear on Facebook. Adding only your post link will allow Facebook to automatically fetch post title, description, and thumbnail.
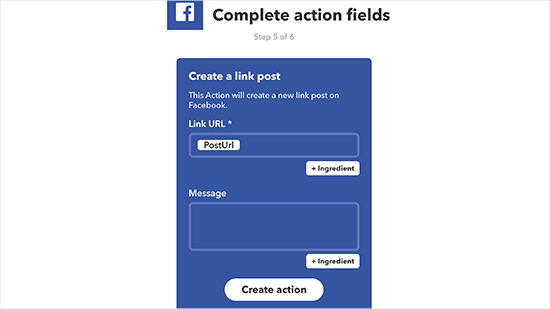
Click on Create action button to continue.
That’s all, you have successfully setup automatic posting to Facebook from WordPress using IFTTT. You can now click on the Finish button to exit the applet setup wizard.

Method 2: Automatically Post to Facebook Using Buffer
Buffer is an online tool that allows you to schedule status updates for your social media profiles including Facebook.
First you need to visit the Buffer website and sign up for an account.
The advantage of using Buffer is that you can schedule the time when you want your posts to be shared. You can select an optimal time for sharing regardless of when you publish a post.
After signing up for a Buffer account, you will need to connect it to your WordPress site.
To do that, you need to install and activate the WordPress to Buffer plugin. For more details, see our step by step guide on how to install a WordPress plugin.
Upon activation, you need to visit WP to Buffer page to configure plugin settings.
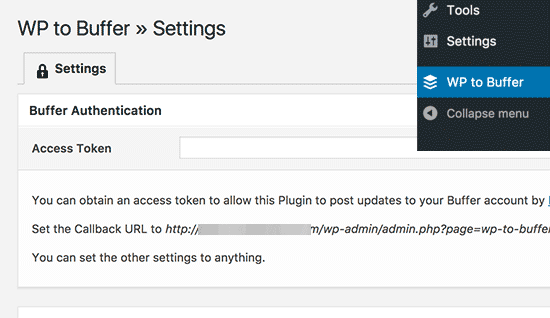
You will need an access token to connect your WordPress site to Buffer. Below the access token field, you will see a callback URL. You would need to copy this URL because you will need it in the next step.
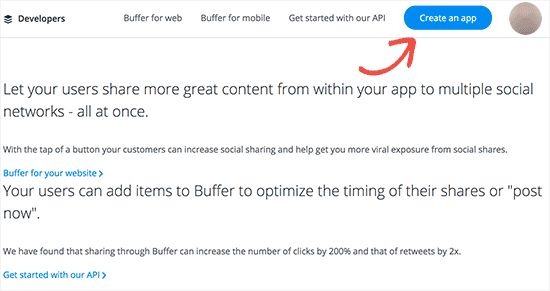
Next, head over to the Buffer Developers website and click on the create an app button.
This will bring you to a form where you need to provide a name and description for your app, your website url, and the callback URL you copied from plugin’s settings page.
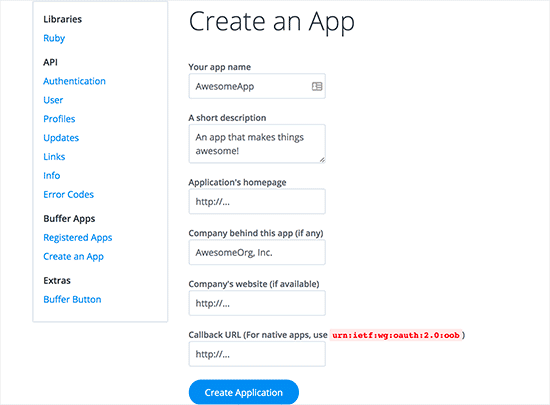
Click on ‘Create Application’ button to continue.
Buffer will now create your app. It will also show you the API keys and access token on the next page.
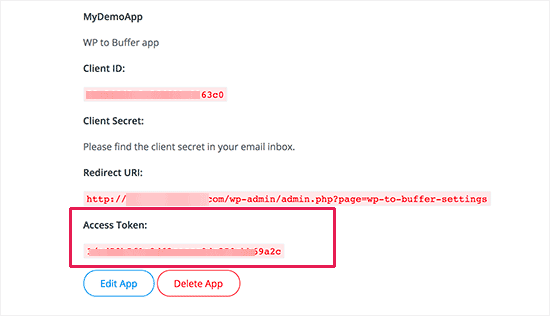
You need to copy and paste the access token to the plugin’s settings page on your WordPress site and then click on the save button to store your settings.
WordPress to Buffer plugin will now connect your WordPress site to your Buffer account. Once connected, it will show you two new tabs labeled Posts and Pages on plugin’s settings page.
Now you need to click on the Posts tab to configure how you want your posts to be shared.
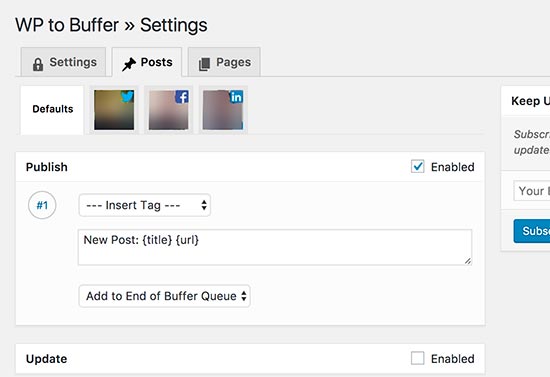
You will see your connected social media profiles. If you haven’t connected any social media profiles to your Buffer account, then you can just head over to your Buffer account and add them.
For this example, let’s click on your Facebook Account and then check the box next to ‘Enable Account’ option. Repeat it for all your social media accounts that you want to automate the process for.
Below that, you need to check Enable under publish and this plugin will show you some more options.
You can compose a custom message and add tags. Adding your post URL will allow Facebook to automatically fetch post title, description, and featured image from your open graph meta data settings.
Don’t forget to click on the save button to store your settings.
That’s all, WP to Buffer plugin will now add your newly published posts to your Buffer queue, which will then automatically post it to Facebook.
To learn more about Buffer and for more detailed instructions, see our guide on how to schedule WordPress posts for social media with BufferApp.
Method 3: Automatically Post to Facebook Using a WordPress Plugin
This method is a bit lengthier to setup, but it gives you more control. You can publish posts in certain categories or tags and include custom post types as well.
First, you will need to install and activate the AccessPress Facebook Auto Post plugin. For more details, see our step by step guide on how to install a WordPress plugin.
Upon activation, you will notice a new menu item labeled ‘AccessPress Facebook Auto Post’ in your WordPress admin bar. Clicking on it will take you to the plugin’s settings page.
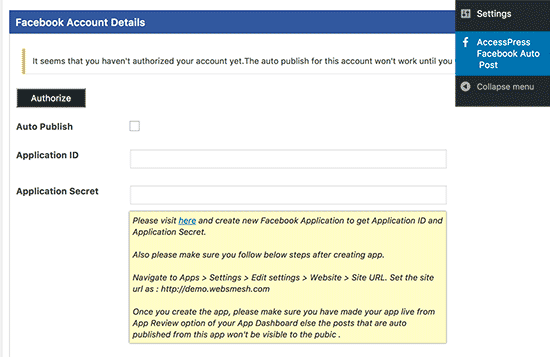
First you need to check the box next to the ‘Auto Publish’ option. This will enable auto-posting on your WordPress site.
After that you will be asked to enter the Facebook application ID and secret keys. You can obtain these keys by visiting the Facebook Developers website.
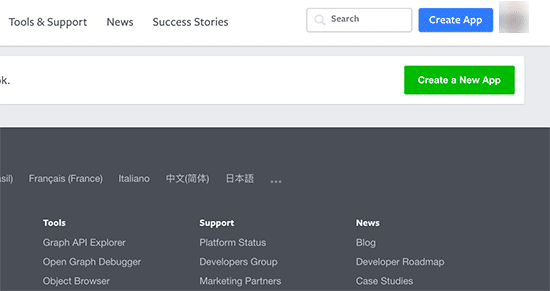
Here you will need to click on the ‘Add a new app’ button.
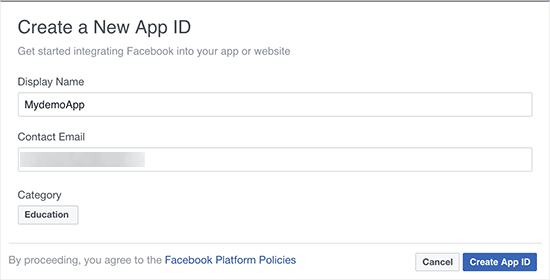
A popup will appear asking you to enter a display name for the app, your email address, and choose a category.
You can choose any name or category and click on ‘Create App ID’ button to continue.
Facebook will now create an app for you.
On the next screen, you need to click on the Dashboard link. This will take you to the app’s dashboard where you will be able to see your ID and Secret keys. You’ll need to click on the show button to see the secret key.
Next, you need to copy and paste these keys to the plugin’s settings page on your WordPress site.
Return to the app dashboard page and then click on ‘Choose Platform’ button.
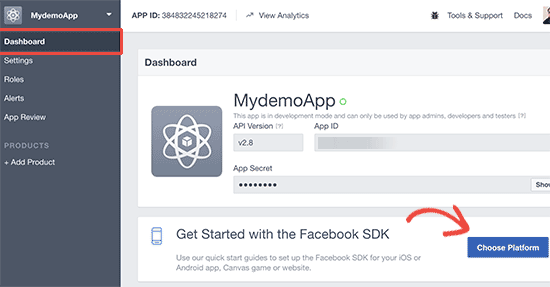
This will bring up a popup where you would need to select a website as your platform.
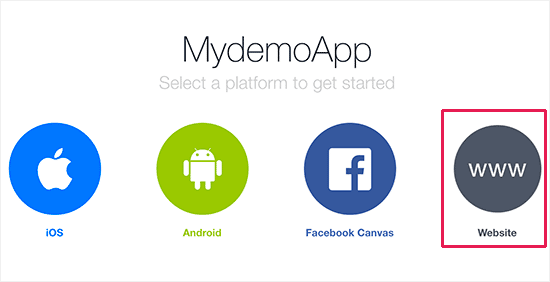
Facebook will now redirect you to a page showing how to use the app on websites with few code snippets.
You just need to scroll down to the ‘Tell us about your website’ section and enter your WordPress site’s URL.
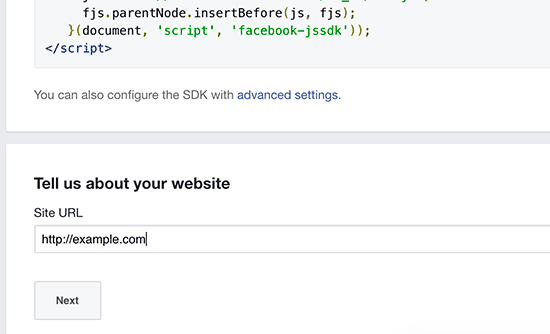
After that click on the next button to save your website URL and finish the setup wizard.
There is still one last step remaining before you can use this app on your website.
You’ll need to visit the App Review page and make your app public by clicking on the Yes button.
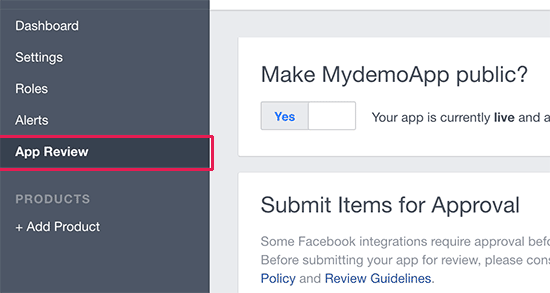
Your Facebook app is now ready to be used on your WordPress site.
Return to the plugin’s settings page, where you need to enter your app ID and secret keys. Don’t forget to click on the save settings button.
Next, you need to click on the ‘Authorize’ button to connect this plugin with your Facebook account.

This will take you to Facebook where you will see a popup asking for your permission.
Click on continue and then select who will be able to see the posts added by the app.
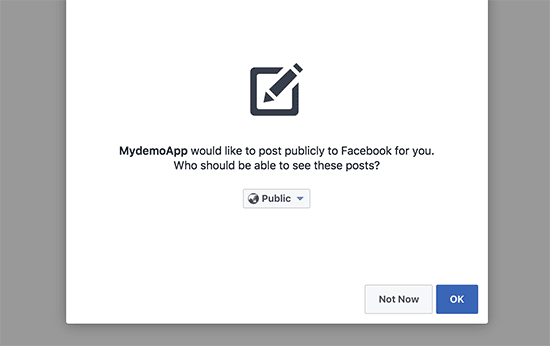
After giving permissions, you will be redirected back to plugin’s settings page on your WordPress site.
Next, you need to add your Facebook account ID in plugin settings. You can use this online tool to find Facebook ID of your account.
Rest of the plugin settings are quite self-explanatory. You can choose which post types you want to auto-post to Facebook. You can also auto-publish posts filed under certain category or tag.
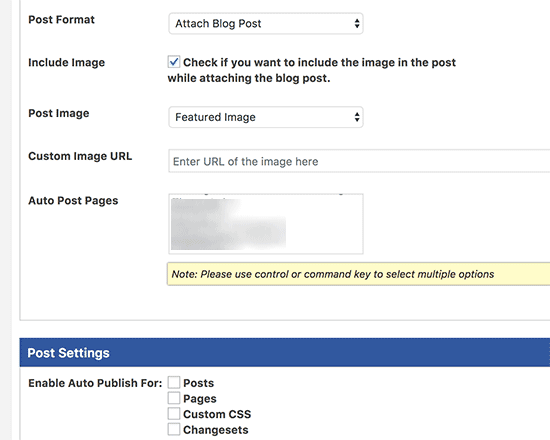
Don’t forget to click on the save settings button to store your changes.
Facebook Auto Post plugin will now start sharing your posts automatically on Facebook based on your settings.


