On this page: Learn how to copy your website’s content and database between your WP Engine environments on your Personal, Professional, or Business plan within the User Portal.

Please note: The tool referenced on this page is available on Personal, Professional, and Business plans. If you are on a Startup, Growth, or Scale plan, learn How to Copy to/from Your Site Environmentsinstead.
Moving a WordPress environment between different development environments can be a pain. That’s why WP Engine has created tools to help you copy and deploy your WordPress content and database between WP Engine environments.
ABOUT THE DEPLOY SITE TOOL
We’re introducing a new tool called ‘Deploy site’ to help you move data between your cloud development environments on WP Engine. Now you can deploy a site between any of your installs. When deploy a site on WP Engine using our tools, we will automatically handle the domain transformations to ensure that your WordPress install smoothly deploys to the live domain on the target environment.
Deploy site is intended to be leveraged with Workspace Groups and Environment labels to replace our classic 1-click staging environment giving you complete flexibility with your development workflow. With these new flexible workflow tools you’ll be able to set up multiple WordPress development environments to create a deployment pipeline using the new deploy tool to move your site’s code and database between environments with ease.

WHAT ABOUT 1-CLICK STAGING?
Our existing 1-click staging environment that is present with every WP Engine install, still exists. You can continue to access it via the WP Engine menu item in the WP-Admin of every WP Engine install. We intend for the deploy tool to replace 1-click staging in the future as we continue adding new functionality to the deploy tool which will make it more robust and flexible. We’ll be sure to give you plenty of notice before we fully replace our 1-click staging functionality, so try out the new deploy tool today!
MOVE CODE AROUND USING DEPLOY SITE
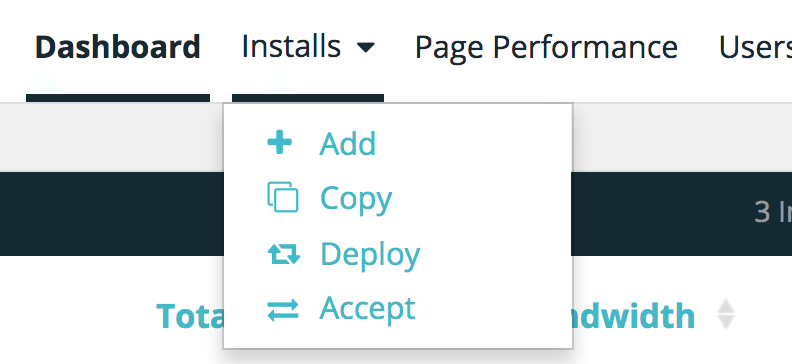
You can access the Deploy site tool in two different ways, from any page in the user portal you can click the ‘Installs’ dropdown menu and choose ‘Deploy Site’

You can also choose ‘Deploy Site’ from the top right corner of an Install’s Overview page.

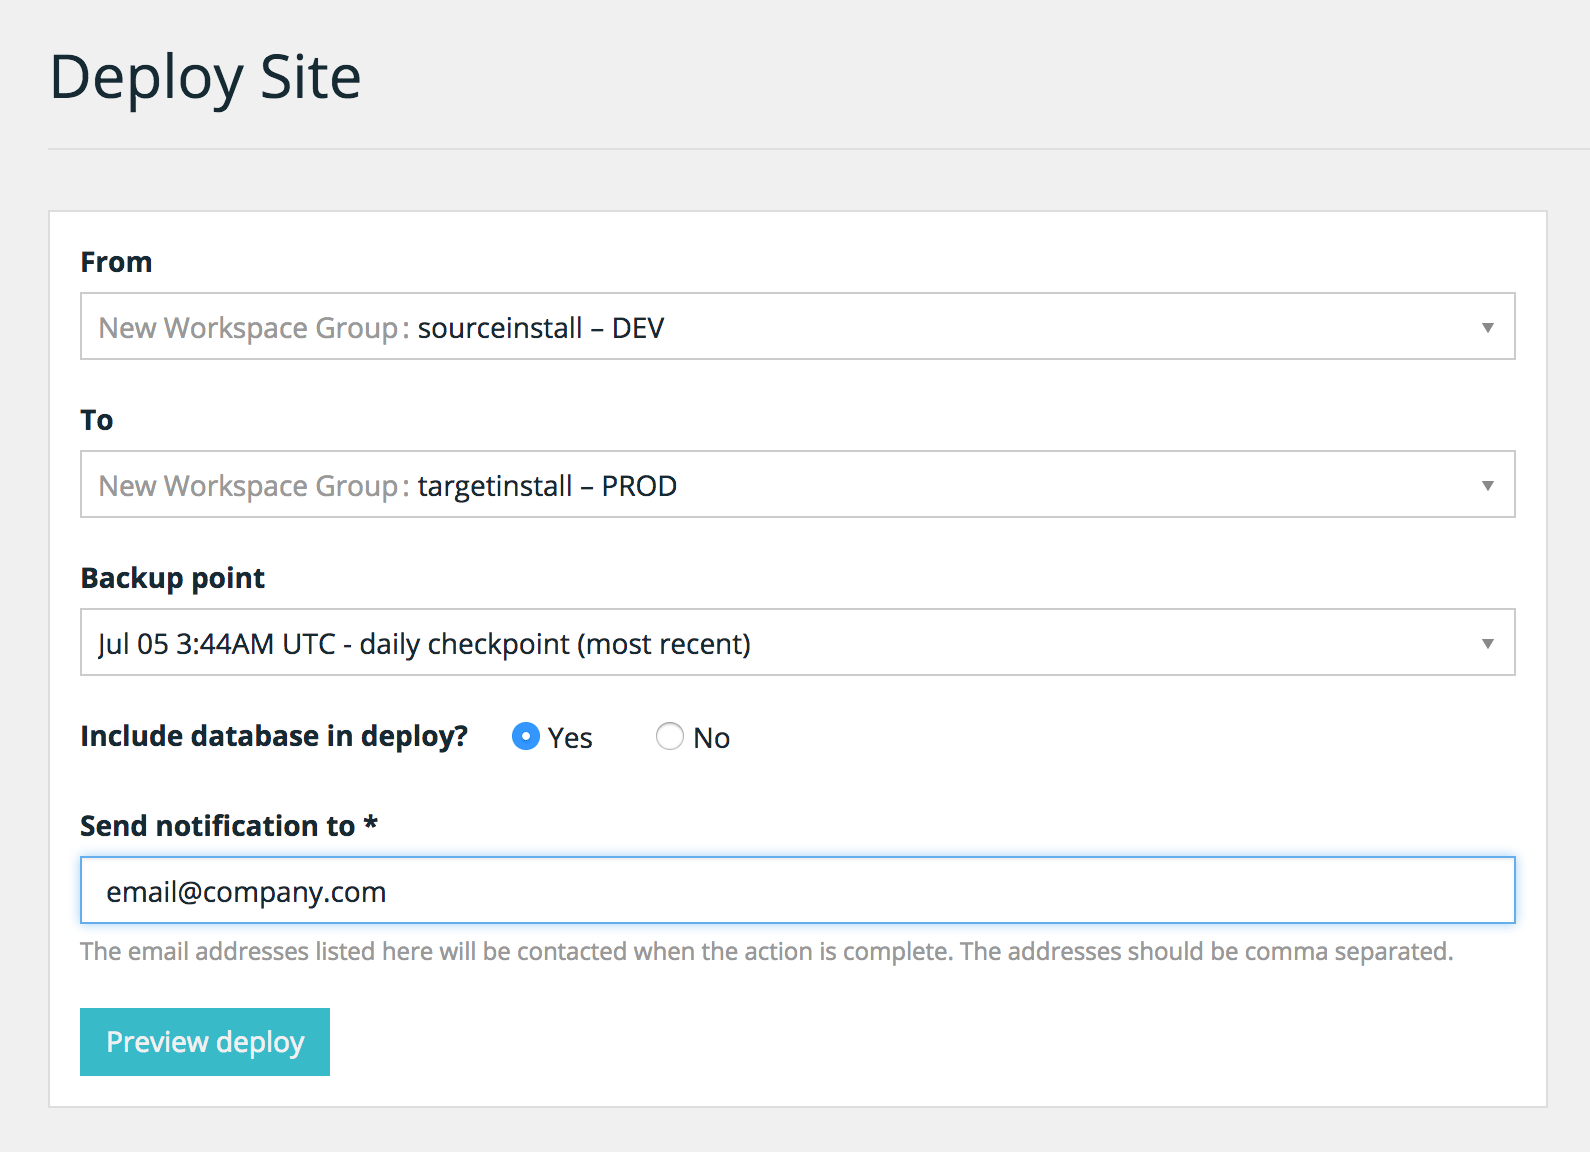
You’ll be taken to the new Deploy site page where you can configure your deploy. Here you select the source install (From) and the target install (To). We have integrated Workspace Groups and Environment labels into the deploy site tool to help you know what environment you are deploying.

Finally choose the backup point that you would like to deploy. If you don’t see the backup point you’d like to deploy you can trigger a new backup point on the ‘Backup points’ page for any install and it will appear in this list. It’s most common to use the most recent backup point. Once you have the desired backup selected, you can choose to have the database restored or omit it to just move over your code. You can also choose to send a notification to select account users, we prepopulate this with your user portal email, this is where you will get notifications about the status of your deploy.
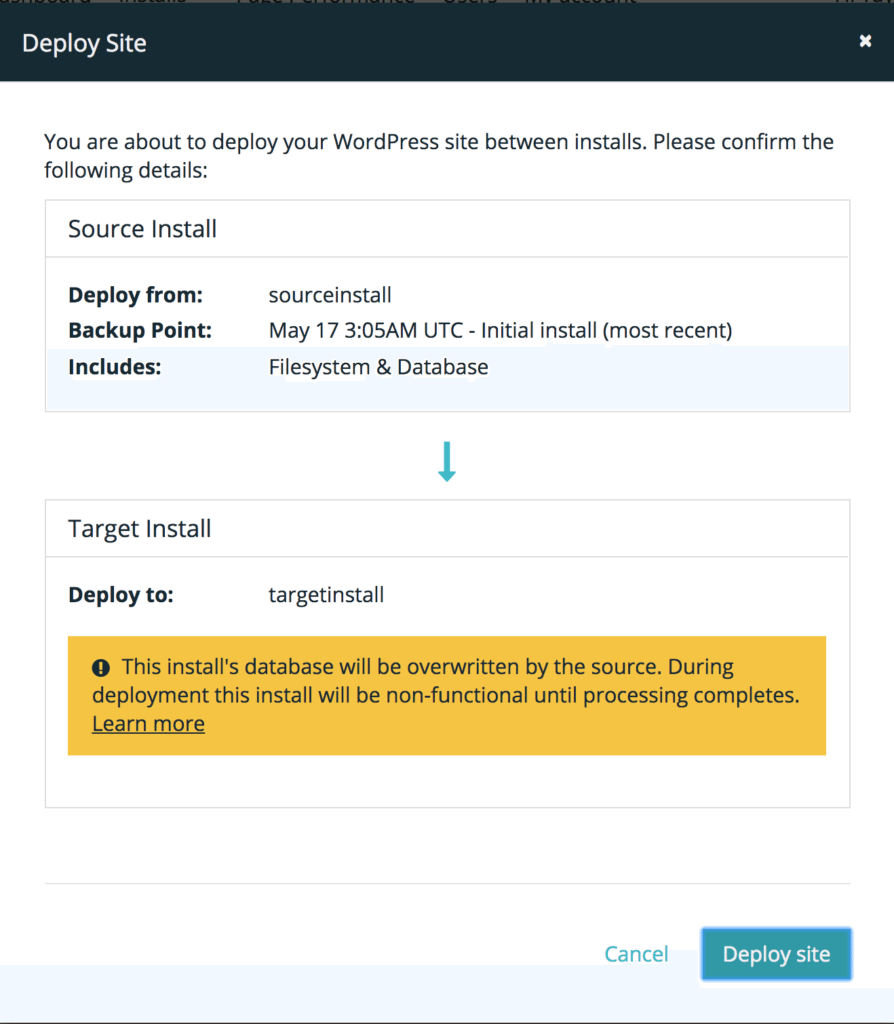
When you’re done click ‘Deploy Site’ to see a preview of your deploy:

Once you confirm your deployment, click ‘Deploy site’ to begin your deploy. We’ll take a backup of the target install to ensure you have a good rollback point (in case something goes wrong), and then deploy your source install into the target install. During this process we’ll automatically handle the domain transformations to ensure that your WordPress install smoothly deploys to the live domain on the target environment.
This is just the first release of our deployment tool, we’ll be adding new features to give you even more control over your deployments. Stay tuned and be sure to subscribe to our blog to be the first to know about new features.


