Most technology enthusiasts have probably heard the term VPN. It’s especially thrown around the enterprise IT world. In fact, “per app VPN” is one of the key enterprise features of iOS 7.
So what exactly is VPN? VPN stands for Virtual Private Network. In short, it connects a client device (Mac, PC, iPhone, etc.) that is using an unsecured Wi-Fi or wired connection to a secured network before transmitting data.
Apple has great support for VPN built right into Mac OS X and iOS. With Apple’s recent renewed interest in the enterprise through it’s partnership with IBM, VPN is a critical solution for customers of all sizes. iOS devices send and receive a lot of personal data, and public Wi-Fi isn’t as safe as many of us would like to believe it is.
While many companies offer VPN solutions for Mac OS X and iOS, Encrypt.me is our favorite. TunnelBear is a close second.
With its “set it and forget it” approach, Encrypt.me is the easiest VPN to use. It automatically connects to the VPN from any Wi-Fi network except the ones you have white-listed. TunnelBear has more competitive pricing, but it requires you to manually connect when you want to secure your connection.
Why is a VPN important?
So why is VPN important for Mac and iOS users? For one, iOS makes it really easy to connect to guest WiFi. While LTE connections are very fast, it’s always ideal to connect to WiFi when possible to avoid eating into your cellular data cap. On the Mac, when you are away from home, you really have 2 options for connectivity: cellular tethering or guest Wi-Fi. Wi-Fi, for all its great qualities, can be insecure if deployed incorrectly. How do you know that someone isn’t sniffing packets on your local coffee shop’s Wi-Fi? How do you know what security measures are put into place at the hotel you are staying at? You don’t.
Man in the middle attacks and rogue access points are among the security concerns you face with Wi-Fi. My rule of thumb is that you should never connect to a Wi-Fi network that you didn’t install without using a VPN. This includes Wi-Fi that requires a password. The existence of a password does not mean that it is secure once you connect to it.
Using a VPN
For Mac and iOS users, what are the options? We want to use free WiFi when it is available, but how do we stay secure? There are so many VPN services to help ensure your browsing is secure, but I’m going to focus on 3 for the purposes of this article.
The home-made VPN
On the scale of ease of use, this is the most difficult. It’s going to require that you knowhow to set it up and make it work. This can include running it on a server you have at the house, a Mac mini at Mac mini Colo, or a general third party service that uses the OpenVPN app from the App Store.
While the other two options I am looking at are more “consumer driven” type services, these are more manual. If you’ve got a spare Mac mini, the folks at Mac mini Colo have a nice blog on configuring it with Mavericks Server. As you can see, it requires a decent amount of setup. As I mentioned, the OpenVPN app for iOS is free. For the Mac, I really recommend Viscosity. It’s frequently updated and is fairly easy to use. Again, OpenVPN and Viscosity are just applications. The applications are worthless without the actual VPN service. Are these services hard to setup? It really just depends on your knowledge of VPN and servers. The Mac makes it a lot easier than other platforms. If you’ve got a static IP address and a Mac that is always on at home, you could even set this up for very little money out-of-pocket.
TunnelBear
TunnelBear is a VPN service that supports PC, Mac, Android, and iOS. The thing that TunnelBear does that more generic services don’t is that it’s built for regular people, not IT administrators. Pricing is fairly simple, but check their pricing page for the most up-to-date information.
Mac and iOS pricing:
- 500 MB/month: Free
- 1 month unlimited: $9.99
- 12 months unlimited: $59.88
iOS-only pricing:
- 500 MB/month: Free
- 1 month unlimited: $3.99
- 3 months unlimited: $9.99
- 12 months unlimited: $29.99
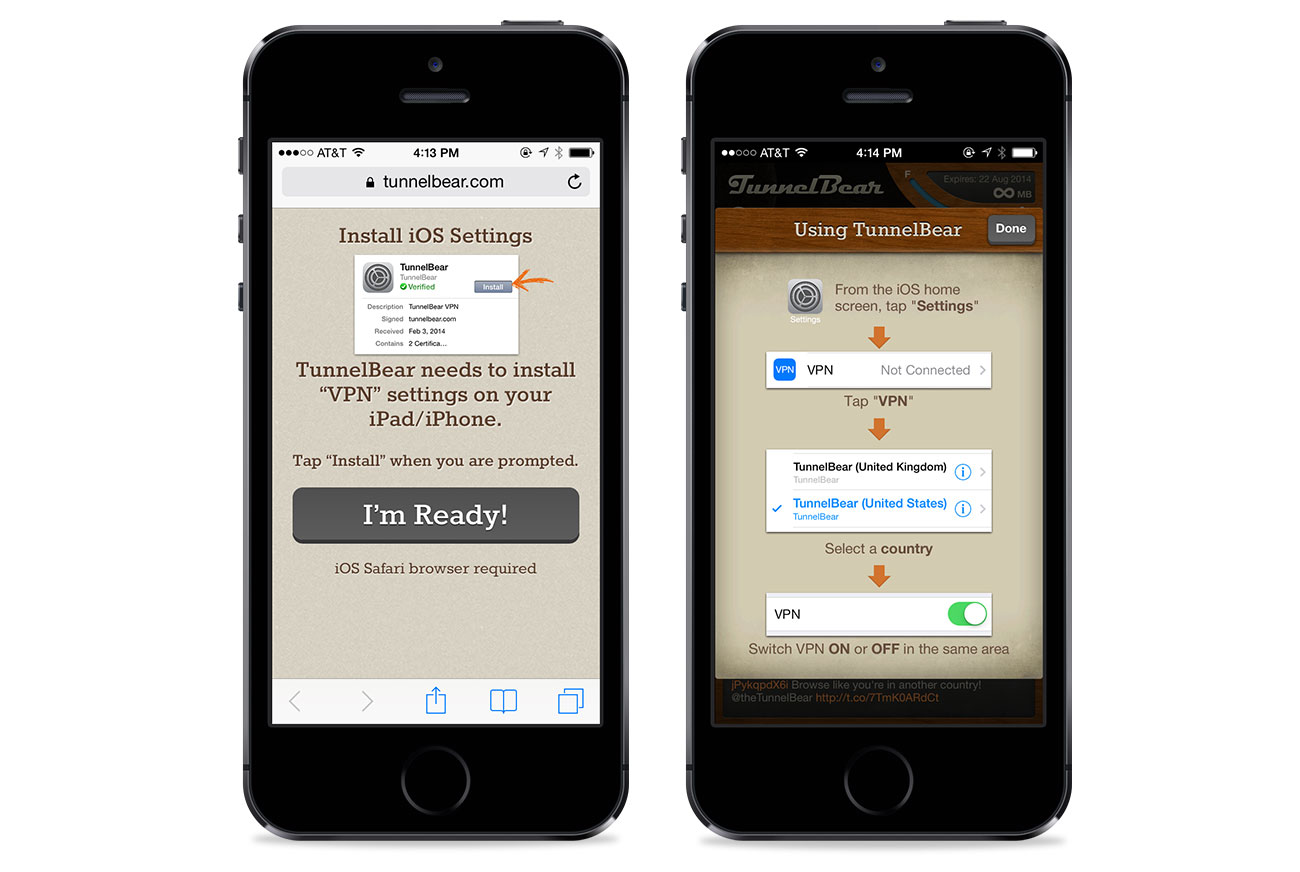
Setting TunnelBear up on iOS is incredibly simple. You download the app and then create an account. Upon first login, you are prompted to install an iOS configuration profile. It’s important to note that iOS handles VPN configuration itself. One of the great things about iOS is that Apple is building various toolkits that companies can plug into. This creates a uniform solution for end-users. Once it’s installed, you are likely to not use the TunnelBear app again unless you are purchasing a plan. To activate the VPN, you go to Settings.app → VPN → Choose your VPN server, and then flip it on.

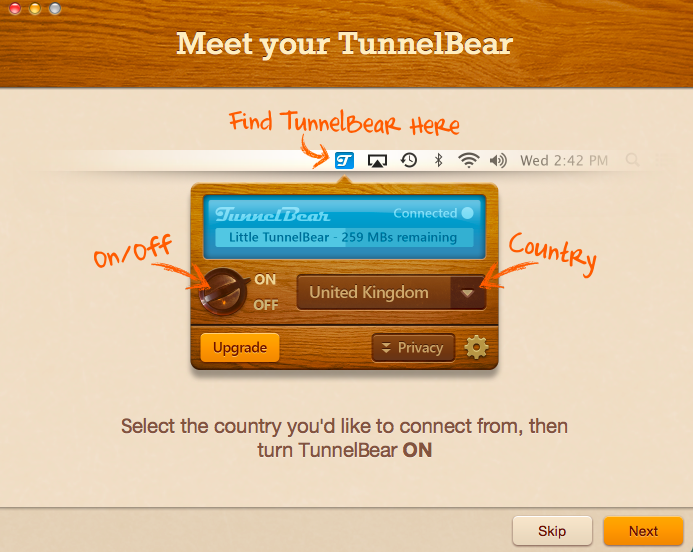
On the Mac side, you drag the app to the Applications folder and then sign into your account upon first launch. The app is extremely simple to use. Once you are logged in, you can select the country you want to use and then flip the switch. Once that switch is flipped, all your traffic is secured.

You’ll notice that there are different countries. Why is this helpful? Let’s say that you are traveling to another country, but want to enjoy your Netflix subscription. By connecting to a US-based server, you’ll be able watch US-based content. Depending on how much you travel and visit places with open Wi-Fi networks, it’s possible the 500 MB plan might be enough. If you are doing more than general web browsing, you will likely burn through it pretty quickly. One of the nice bonus options that TunnelBear offers is a 1 GB Twitter bonus that you can do once a month. If you combine that with the 500 MB free plan, you’ve got 1.5 GB for free.
TunnelBear is a really nice service and works as advertised. Using any sort of VPN connection is slightly slower than a direct connection, but I barely noticed it. It’s a fantastic service.
Encrypt.me
Encrypt.me is another “set it and forget it” type VPN service. Like TunnelBear, it’s aimed at regular consumers rather than IT professionals. On the surface, it looks similar to TunnelBear, but just more expensive on the unlimited plans:
Through iOS In-App Purchase:
- 1 Week Pass: $3.99
- 30 Day Pass: $9.99
- 12 Month Pass: $99.99
Through the Encrypt.me website, you have several account options at varying price points. They outline all the options and prices on their Pricing page.
- Passes: These are short-term passes that offer unlimited data during the term. These range from a week, a month, to a year.
- Subscriptions: Subscribing on a monthly or yearly basis gets you unlimited data.
- Families: Same thing as subscriptions, but for up to 5 members.
- Teams: A convenient way to centrally manage, administer, and pay for a team of members. As you might expect, you get price breaks as you add more users.
There’s also a Mini Plan that offers 5 GB of data for $2.99 a month, which is a good deal if you only need to use the service lightly.
Encrypt.me also offers a similar tweet bonus that Tunnelbear does if you are on the 5 GB plan.
All of these plans are unlimited. So if you compare prices, TunnelBear is quite a bit cheaper per year than Encrypt.me on the unlimited plans. You might be asking, why would anyone sign up for Encrypt.me at those prices?
Encrypt.me has one killer feature: it automatically connects and disconnects based on the Wi-Fi network you are connected to. Here is how this might work in practice: Your home network and your work network are set to trusted. When you are connected to those networks, your VPN is off. When you visit your local coffee shop, Encrypt.me will automatically connect and secure your connection. When you leave that Wi-Fi connection and switch back to LTE, Encrypt.me will disconnect (you can set cellular connections to untrusted if you want to).
Why is this important? It’s because it makes security automatic. With OpenVPN-based services and TunnelBear, you have to remember to turn the VPN on whenever you need it. With Encrypt.me, unless you have specified the Wi-Fi network you are using as trusted, it will connect. When you connect to Target’s guest Wi-Fi, it will connect. When you connect to Starbucks’ guest Wi-Fi, it will connect. When you connect at home, it will not connect.
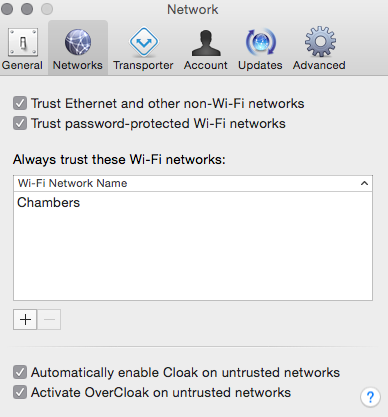
Installation of Encrypt.me for Mac and iOS is extremely simple. On the Mac, you download the application and drag it to your Applications folder. Once you launch it, you log into your account and you are off and running. Encrypt.me makes it very easy to modify trusted networks vs. untrusted, and it also includes an option to always trust non-WiFi based networks (ethernet, etc).

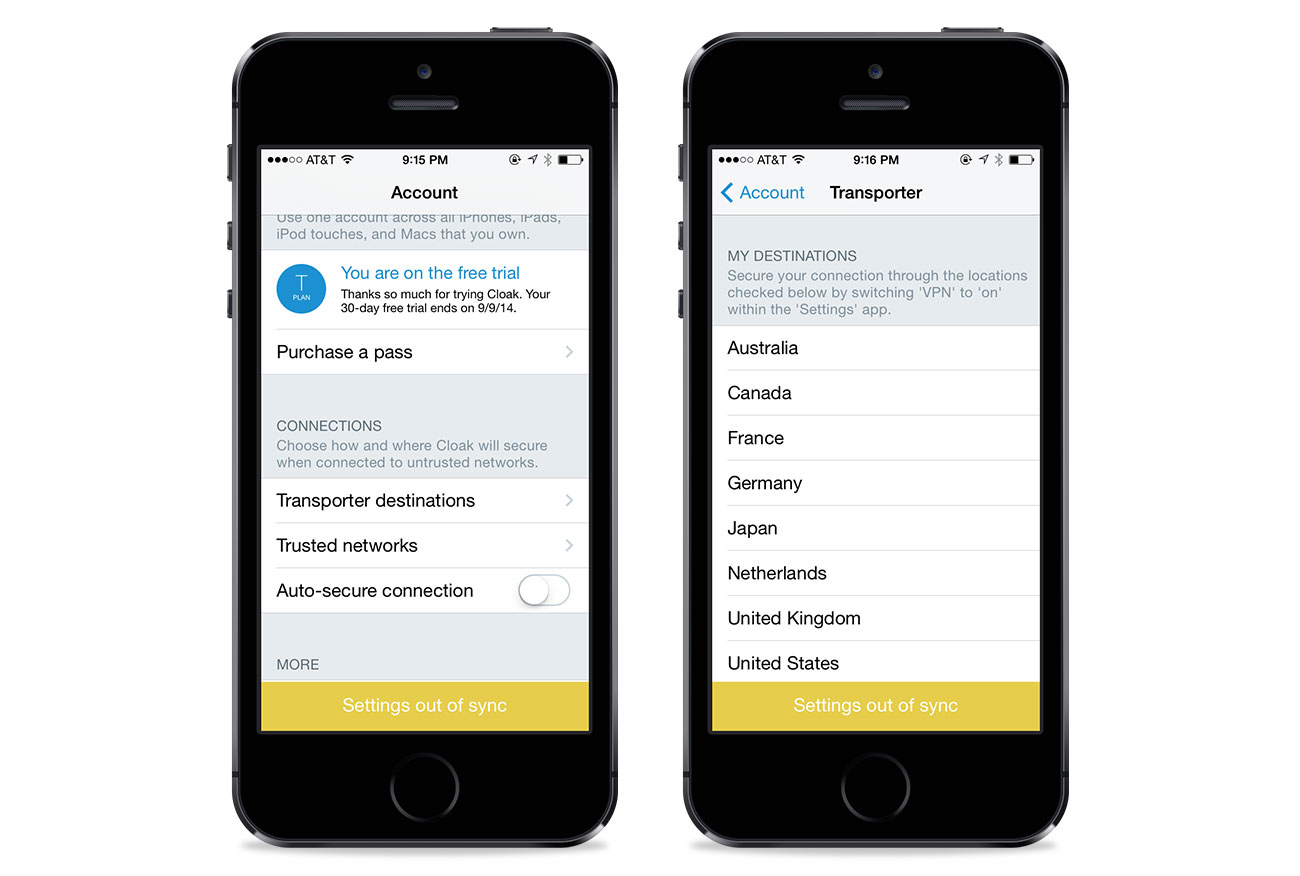
On iOS, installation is simplified even further. You download the app from the App Store and it walks you through the installation process. It’s a very similar process to TunnelBear since you install an iOS configuration profile. As I mentioned earlier, the secret sauce of Encrypt.me is that once you tell the app your trusted networks, you no longer have to interact with the app. It will turn itself on and off automatically.

So, what’s the best option?
Encrypt.me and TunnelBear each have 2 distinct advantages. TunnelBear is cheaper on the unlimited plan, but Encrypt.me has the auto-connect feature.
If you are the type of person who frequently uses public Wi-Fi (traveling, coffee shop meetings, etc.), I recommend Encrypt.me. If you are the type person who spends the majority of the day at home and work (and you trust your work Wi-Fi), then TunnelBear is probably a better choice because it’s 50% cheaper on the yearly plan (or 70% if you only use iOS).
Encrypt.me offers a 14-day free trial and TunnelBear offers a free 500 MB a month plan, so there is no reason not to try both and see which one works best for you. Both companies offer a “tweet” bonus, where you can tweet about their service for a quota bonus.
Encrypt.me is our favorite based on its ease of use. It’s still inexpensive for everything it offers. Once you get your “whitelisted” networks setup, you’ll likely not need to use the app again unless you are managing your account. It’s is truly a “set it and forget it” type service.
Whatever you do, if you use Wi-Fi that you don’t manage, make sure you are using a VPN.


